Teka EM 30 2P Manuel d'utilisateur
Naviguer en ligne ou télécharger Manuel d'utilisateur pour Plaques chauffantes Teka EM 30 2P. Teka EM 30 2P Manuale d'uso Manuel d'utilisatio
- Page / 21
- Table des matières
- MARQUE LIVRES
- Inhaltsverzeichnis 2
- Table des matières 3
- Présentation / Presentazione 4
- Installation 7
- Positioning the oven 8
- Fixing the hob 8
- Connecting the gas 8
- Connecting the electricity 8
- Gas conversion 9
- Technical Information 10
- Technical information 11
- Use and Maintenance 12
- Anti-accidental turn system 13
- Safety system components 13
- (fig. 4) 13
- Suggestions for effective 14
- Cleaning and looking after 14
- Operation of models with 15
- Maintaining the burners 15
- Cleaning and looking 16
- Operating the glass 17
- Advice on using the electric 18
- Should it be used to clean 19
- Protected blade 20
- Unprotected blade 20
- If something doesn’t work 21
Résumé du contenu
INSTALLATION INSTRUCTIONSAND RECOMMENDATIONS FOR USE AND MAINTENANCEHOBSEINBAU-ANLEITUNGUND EMPFEHLUNGEN FÜR GEBRAUCH UND INSTANDHALTUNGKOCHFELDERINST
GB10Dimensions and powerModelsHob dimensionsHeight (mm) 90 90 90 90Length (mm) 510 510 510 510Width (mm) 300 300 300 300Dimensions of the placement in
11GBTechnical informationCOMMON FEATURES FOR ALL MODELSWITH ELECTRIC HOTPLATES AND AUTO-MATIC IGNITIONThe supply voltage and frequency will beas shown
GB12Special requirements beforestarting for the first timeBefore connecting the hob to the electricmains, check that the voltage and fre-quency of the
GB13Only pans with a minimum diameter of 140mm should be used on each burner. If youwish to use a pan with a diameter of 120mm or smaller, it should b
GB14signal to the tap. Should the burner go out,the absence of a flame is detected by thethermocouple, which makes the safety tapcut off the flow of g
GB15that have lengthy contact with the ena-mel surfaces.* The stainless steel should be washed insoapy water using a soft cloth. If themetal is yellow
GB16When first connecting, or if the hotplatehas not been used for some time, themoisture absorbed by the insulation needsto be eliminated. To carry o
GB17* The electric hotplates should be cleanedusing soapy water and a non-abrasivescourer. If, after cooking, you notice thatthe electric hotplate’s s
GB18hotplates heat up, according to the timewhich has been set. The timer shouldnever be set to zero if the hotplates are towork.Advice on using the e
GB19should be cleaned each time it is used,when it is either lukewarm or cool. Thismakes cleaning easier and avoids dirtaccumulating through repeated
IndexIntroductionUser GuideInstallationPositioning the hobsPositioning the ovenFixing the hobConnecting the gasConnecting the electricityGas conversio
GB20Worn trim is the result of using abrasivecleaning products or pans with unevenbases which wear down the serigraphy.Take great care when using theg
GB21If something doesn’t workFault Possible cause Possible solutionNeither the hotplates nor the pilot lights are workingThe cable is not connectedto
Table des matièresPrésentationGuide d’utilisationInstallationLogement des tables de cuissonLogement du fourFixation des tables de cuissonRaccordement
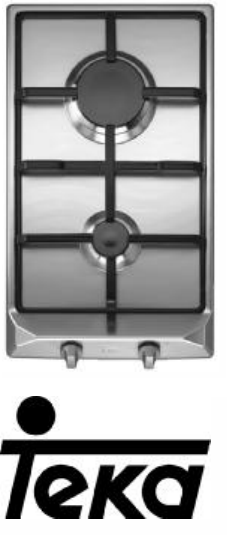
Models EM/30 2G AI AL, EM/30 2G AI andEM/30 2G1 Rapid burner 2,580 Kcal/h - 3 kW.2 Auxiliary burner 860 Kcal/h - 1 kW.3 Grid.* Maximum calorific power
512Models VM/30 2P and VM/30 2P-T 1 Electric hotplate 1,700 W, Ø 180 mm.2 Electric hotplate 1,200 W, Ø 145 mm.3 Residual heat indicator.4 Timer* Maxim
GB6Guide to Using the Instructions BookletDear customer,We are delighted that you have put yourtrust in us.We are confident that the new hob that youh
GB7ImportantINSTALLATION AND SETUP SHOULDBE CARRIED OUT BY AN AUTHORISEDTECHNICIAN IN LINE WITH CURRENTINSTALLATION STANDARDS.Positioning the hobs A g
GB8TEKA assumes no responsibilityfor any malfunction or damage causedby faulty installation.PLEASE REMEMBER THAT THE GUA-RANTEE DOES NOT COVER THEGLAS
GB9located lower down, and on the guaranteecertificate or, where appropriate, the tech-nical datasheet supplied, which should bekept together with thi
Produits connexes et manuels pour Plaques chauffantes Teka EM 30 2P
 (15 pages)
 (30 pages)
© 2020, manymanuals.fr. Tous droits réservés | 1.348 s |
 Manymanuals.com
 Manymanuals.de
 Manymanuals.fr
 Manymanuals.it
 Manymanuals.pl
 Manymanuals.cz
 Manymanuals.es
 Manymanuals-pt.com
Commentaires sur ces manuels